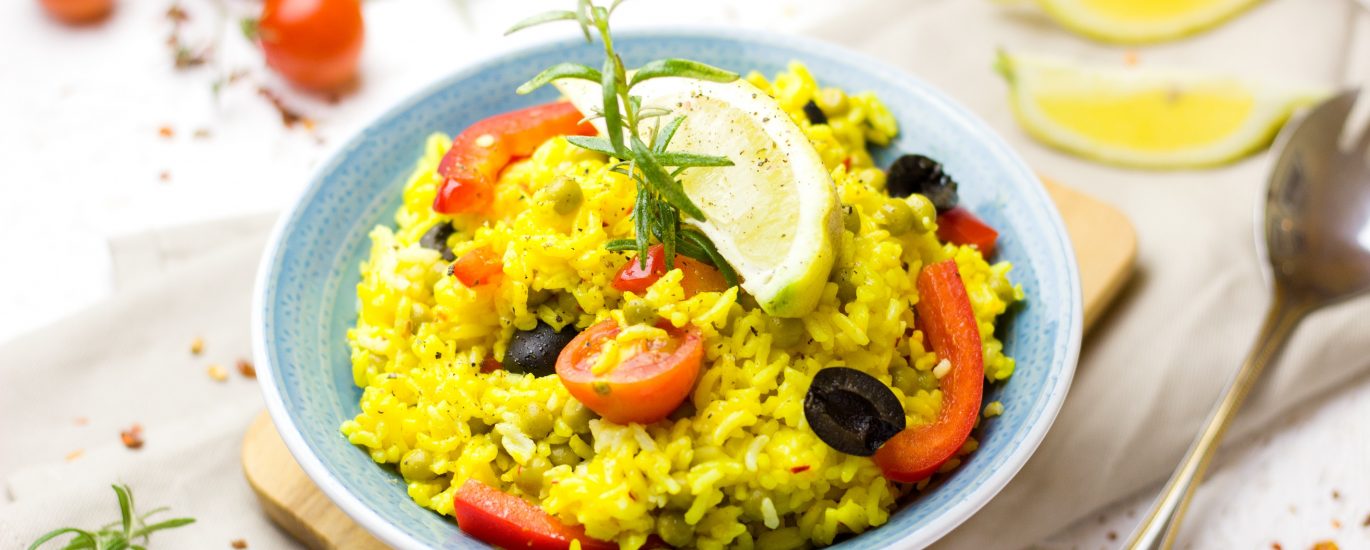
Related Posts with Thumbnails


Subscribe to posts


 Subscribe to email posts


Subscribe to my free monthly newsletter

Newsletter Archives

June 2010

July 2010

August 2010-present


April's Top 5 Posts

Lunch Lady Peanut Butter Cookies

Silver Noodle Bead Bracelets in Pink and BlueJewel Toned Mason Jars (Easy DIY )

Simple Tomato Soup (Campbell's Copycat)

Mom's Slow Cooked Boston Baked Beans 

Unless otherwise noted, all content and photos are property of Elle @ Elle's New England Kitchen. Copyright 2008-13. All rights reserved. If you'd like to reprint an article or use a photo, please contact me for permission at ellenekitchen at gmail dot com. All photos, unless specified, have been taken by me, and if used without permission, an invoice will be forwarded to the proper business/individual. Thank you.


Proud member of FoodBlogs

Categories

Entries in spinach (7)

Wednesday
Aug012012

Chicken and Spinach Enchiladas and a Cookbook Review/Giveaway

whats-for-supper-cookbook

“Mom, what’s for Supper?”

I hear this every single day, as I’m sure a lot of you do. Sometimes that very simple question can strike fear into your heart. “Eek! What is for supper?”

It’s so easy to fall into a rut as far as dinners go. Not to mention trying to please everyone at the table. Southern Living has a new book that helps with these two problems, and it’s packed--bursting with easy 30 minute meals that are sure to make your life easier.

Contest is closed, but the enchilada recipe is still fantastic! Our random winner is comment #30, Amy M. Congrats, Amy! Thank you all for reading and entering.

What’s for Supper” is written by Southern Living Test Kitchen Specialist Vanessa McNeil Rocchio, who has over 20 years of experience in the Southern Living Test Kitchens. The book is based on her popular column of the same name in Southern Living, and it includes more than 250 recipes!

Read through to enter for a chance to win your own copy of What’s for Supper!

Chapters and their descriptions are:

  • The Supper Table. Simple, quick-fix ideas for salads, beverages, breads, and desserts.
  • Dinner’s in the Pantry. Recipes made with pantry staples.
  • Don’t Drive Through, Drive Home. Quick favorites that taste better than fast food.
  • No-Cook Suppers. Leave the oven or stove off for these gems.
  • Slow Cooker. Hands-off meals that cook so you don’t have to.
  • Picky Eaters. Kid-friendly recipes to suit any taste.
  • Cooking for Two. Downsized dishes that can easily be increased for a crowd.
  • Weeknight Company. Special recipes that welcome company any night of the week.

Plus, scattered throughout the book are Vanessa’s Savvy Secrets, which are techniques and tips from the Southern Living Test Kitchen; Sidekicks, convenient side-dish suggestions; Time-Saving Tips; and Table Talk, dinner table conversation starters.

Chicken and Spinach Enchiladas

I fell in love with this book right away. Every recipe has a full color, stunning photo. They make you want to try everything immediately! The recipe text is laid out right inside the photos which makes it lovely to look at, as well. I have so many recipes earmarked to try, and I’m sure you will, too! There are a few recipes that make use of convenience items like a flavor/seasoning packet, a can of soup, or a jar of sauce. Are these deal breakers? No way! If you want to use them, feel free! If not, make your substitution and go, like I did with the enchilada sauce in this recipe. The recipes are worth it. There are so many great ideas in this book. From salads and sandwiches (hot and cold!), to meats and vegetables, pastas, casseroles, grilling recipes--it’s all covered in here. Go have a look inside the book!

We absolutely loved these Chicken and Spinach Enchiladas! Even my seventeen year old, who was pretty sure she wasn’t going to like them. The filling is delicious--creamy and full of chicken. And simple, too! I will definitely make these again.

Chicken and Spinach Enchiladas

Chicken and Spinach Enchiladas*

Makes 6 servings.

1 (10 oz) package frozen spinach, thawed
1 (16 oz) jar chunky salsa, DIVIDED
20 oz enchilada sauce (Recipe follows, or use 2 -20 oz cans ready made sauce.)
1 (8oz) package cream cheese
2 1/2 cups shredded cooked chicken (I used a rotisserie chicken)
10 (8  inch) flour tortillas
1 (16 oz) bag shredded Mexican four cheese blend
Toppings/Side Ideas:
Shredded lettuce
Chopped cilantro
Chopped red onion
Halved grape tomatoes


Enchilada Sauce

Makes about 2 cups

Olive oil
1 medium onion, finely diced
2 garlic cloves, minced
1 1/2 cups chicken broth
1 tbsp chili powder
1 tsp dried oregano
1 1/2 tsp cocoa powder
1/8 tsp cinnamon
1 tsp salt
1 (8oz) can tomato sauce

In a medium sauce pan, heat a bit of oil over medium heat. Add the onion and garlic and sauté for about 5 minutes. Add the broth and remaining ingredients. Bring to a boil, then reduce heat and simmer for about 10 minutes. I like to pour it into a square baking dish so it can cool a bit, and so it's easier to dip the tortillas into it.

Heat the oven to 350 degrees. Lightly grease a 13x9 inch baking dish. Set aside. Drain spinach, squeezing out as much liquid as you can.

Stir 1/4 cup of the salsa into the enchilada sauce, and set aside. Microwave the cream cheese in a medium sized bowl for one minute. Stir in the spinach, chicken, and remaining salsa. Stir until well blended.

I like to do this next step on a large cutting board for easy clean up. Dip each tortilla into the enchilada sauce and place it on the cutting board. Spoon a heaping 1/3 cupful of the filling down the center of each tortilla. Roll up the tortilla and place it in the prepared pan, seam side down. Continue until you've used all the of the tortillas. I had some extra tortillas and made a few extra for a total of 13. Pour the sauce over the enchiladas and sprinkle with the cheese. Bake for 30 minutes, remove from oven and let stand for 5 minutes. Serve with desired toppings.

  • I serve ours with a simple side salad of lettuce, sliced avocado, tomatoes, and a drizzle of olive oil. Sprinkle with a bit of kosher salt and fresh cracked black pepper. Top with a spoonful of Greek yogurt or sour cream.
  • Southern Living used 2 (10 oz) cans of red enchilada sauce. I had everything on hand to make homemade, so that's what I used. They also don’t dip the tortillas in the sauce before filling and rolling, but I like to.
  • I’ll have another recipe for you from the book later in the week, so stay tuned!

*Recipe reprinted with permission from Southern Living What's for Supper, Oxmoor House 2012. I was given a copy of the book for review at no charge, and was not paid for my opinion.

whats-for-supper-cookbook

Win your very own copy of What’s for Supper!


I have one copy to give to a lucky, hungry reader. Entering is extremely simple--just leave a comment on this post. Simple as that!

1) Leave a comment on this post for one entry.

Extra, Optional Entries:

2) Tweet about this giveaway if you like, and leave a comment here for an extra entry.

3) If you would like to share about this on Facebook, leave one more comment here telling me you did.

That’s three chances for you to win!

I’ll choose a random winner on Wednesday, August 8th at midnight, EST. US shipping only. Good luck!


Thursday
May172012

The Junk Yard Special (My New Favorite Sandwich)

The Junk Yard Special

What could be bad about about turkey, provolone, fresh mozzarella, and roasted peppers? Nothing! Add in the other savory ingredients, and you have a sandwich that will satisfy the toughest sandwich critics.

This sandwich has a list of ingredients that I probably wouldn’t have ever gotten around to putting together, so I’m thrilled that someone else already did. Sure, I love every ingredient here on it’s own, but I’m not living in a deli. I have everything listed here in my kitchen in regular rotation, but not always at the same time.

It’s no secret that I love the Food Network show “The Best Thing I Ever Ate.” I mean--I love food, so in turn, I love hearing what other people are eating. I found these eggplant burgers from the show, and we just love those! We were watching a few weeks ago, and the episode was about delis. Adam Gertler was talking about the Junk Yard Special from Sarcone’s Deli in Philadelphia. You can see Adam’s show clip right on the front page of their site.

I knew that I had to have that sandwich. It was one of those things that reaches out and grabs you by the shirt and says “You. Want. Me.” I do, I do!

So! Couldn’t be any simpler. I bought some nice deli rolls and toasted them first. Did you hear Adam take that bite of his sandwich? It crackled. I needed to have that crackle, too. (By the way, as I write this, all I can think about is having one of these. Hungry!)

The Junk Yard Special

Junk Yard Special

Amounts are up to you. How many sandwiches are you making? You don't need a ton of each thing in one sandwich--a couple slices of meat and cheese per roll, etc. If you're making a lot, buy 2 bags of spinach since it really cooks down.

Sandwich rolls
Olive oil
Red wine vinegar
Sliced deli turkey
Thinly sliced Prosciutto
1 (7-8 oz) bag fresh baby spinach
Roasted Peppers with Garlic (jarred or fresh)
Fresh Mozzarella, sliced
Provolone Cheese, sliced
Fresh basil leaves, stacked up, rolled, and sliced across to form ribbons or strips
Dried basil
Dried oregano

Start by lightly sautéing the spinach. Heat a skillet over medium low heat. Add the spinach and a small amount of water--a couple tablespoons or so, and a touch of salt and pepper. Keep moving the spinach around until it's wilted and softened. Remove from the pan and place it in a strainer to let any extra water drain. Set aside to cool.

Heat oven to 350 degrees to toast the rolls. If they're not sliced, slice them almost through, leaving them attached at the bottom, then place them in the oven for about 5 minutes. Set aside.

When your rolls are ready to go, you can make your sandwiches. Start by drizzling the inside of each roll with oil and vinegar. Layer the remaining ingredients in this order:

Sliced turkey
Prosciutto (I like to cut up the prosciutto, since it has a habit of coming out of a sandwich in one piece when you bite it.)
Sautéed spinach (Just give it a bit of a squeeze over a paper towel so it's not too wet.)
Roasted peppers
Fresh Mozzarella slices
Sliced Provolone
Fresh basil strips
Dried basil and oregano

That's it--dig in and pig out. Oink!

  • These sandwiches have a wonderful balance of flavors. I can’t imagine them without the red wine vinegar, for instance. The peppers just belong in there. The cool, fresh mozzarella hits your tongue and is then followed by the sharpness of the provolone and the smokiness of the prosciutto. You can adjust these any way you like, but they’re perfect as is, I think.
  • That said, they are versatile. Don’t like turkey? Try ham. I couldn’t find any roasted peppers at Trader Joe’s (weird), so I picked up a roasted pepper and eggplant garlic spread.
  • Vegetarian? Leave the meat out. The rest of the ingredients are full of flavor so you won’t miss it.
  • Want more of something or less of something? Up to  you--adjust to your liking.
  • Hot summer evenings on the horizon? Don’t cook--make these sandwiches!


The Junk Yard Special


Wednesday
Aug312011

Andouille Sausage Pasta/Pepper Thing, plus a Giveaway

Andouille Sausage/Pepper Pasta Thing

Contest is closed, but the recipe is still fantastic, so scroll down for that!

The random winner is #13, Marie. Congrats, Marie!

Stay tuned for more fun giveaways...

Up until I made this dish, I’d never had Andouille sausage. It’s true. Now I see that I’ve been missing out. Why didn’t any of you tell me how deliciously spicy it was? Where were you all when I was perfectly happy having Italian sausage? I love Italian, too, but this Andouille…it could make me forget about Italian sausage for a long while. This is serious, folks.

We regularly visit a farm in MA called Tendercrop Farms. They’ve got the usual local produce and locally made things, along with great gifts, beautiful plants, etc. What you would expect when you visit a farm. They also have this fabulous meat counter in the back of the store, with their own fresh meats and sausages! One weekend, on a whim, we got some Andouille. I had no idea what to expect, but as they usually do, they had samples out for customers to try. I’m not going to lie, I went back for about five samples from the Andouille tray. It’s addictive! I had no idea what I was going to do with it, other than cook it, hide in a dark room, and eat the whole pound of it by myself! Ahem…that thought never crossed my mind. Really!

This dish is very easy to make. It’s just a few steps to a nice bowl of slightly spicy comfort food. Add crusty bread--maybe with butter and garlic, and oh yes, comfort food heaven. We’re coming up on cooler weather in this part of the world, so think about this one when you’re craving a hot bowl of something that will warm you from the inside out. Or just crank up the AC and pretend it’s cold outside!

A note about the sausage--if you can’t find Andouille, use your favorite. If you want it sliced, cut it when it’s still slightly frozen. It'll hold it’s shape this way. If it’s fresh, put it in the freezer for 20-30 minutes to firm it up--this works just as well. If all else fails, remove it from the casing and crumble it in.

Andouille Sausage/Pepper Pasta Thing

Andouille Sausage Pasta Thing

Serves 4 hungry people

1 (16 oz) box bowtie pasta (or your favorite shape)
olive oil
4 cloves garlic, minced
1/4 cup chopped shallots (or onion)
1 small red bell pepper, seeded and sliced
1 small yellow red pepper, seeded and sliced
1 cup oyster mushrooms (or whatever kind you have on hand)
Old Bay Seasoning
fresh cracked black pepper
1 (6 oz) bag baby spinach leaves
1 pound Andouille sausage, sliced or removed from casing (if you can't find it, use Italian sausage)
2 cups chicken broth
1 tbsp cornstarch
small amount of water
1 1/4 cup small heirloom, grape, or cherry tomatoes, cut in half
1/2 cup fresh sliced basil leaves
grated parmesan cheese

Set a large pot of water to boil for the pasta. Cook the pasta according to package directions, drain, toss with a small amount of olive oil, and set aside in a large bowl.

While the pasta water is coming to a boil, and while it cooks, set a large skillet over medium heat. Quickly sauté the garlic and shallots, about one minute or so, then add the peppers and mushrooms. Sprinkle with the Old Bay (about 1 teaspoon) and the pepper (about 1/2 teaspoon). Cook for about 3 minutes, then add the spinach. Cook one more minute and remove from the pan. Set aside.

Add the sliced or crumbled sausage to the pan and cook until no longer pink. Remove from the pan and set aside. Carefully wipe out the pan and place it back on the burner.

Add the broth to the pan and set the heat to high. Bring it just to a boil. Mix the cornstarch with just enough cold water to dissolve it--about a teaspoon or two. Mix it so there are no lumps, and then stir it into the broth to thicken it.

Turn the heat back to down to medium low. Add the bell pepper/mushroom/spinach mixture and the cooked sausage back to the pan, and stir to coat. Add the basil and tomatoes into the pan at the last minute, stir them through.

Pour all of this over the pasta that you've set aside. Toss to coat, test for seasoning and add salt and pepper if needed. Serve and sprinkle with grated parmesan cheese.

  • If you’re lucky enough to have leftovers, hide them for yourself! This tastes just as good, if not better, the next day.

Andouille Sausage/Pepper Pasta Thing


Now for the Giveaway!

Back to the Roots Mushroom Kit

We grew our own Oyster Mushrooms, right at home! It was totally fun,too. I was amazed how quickly they grew once they started--it was like there was no stopping them! Also, the kids really enjoyed watching them sprout to life. Most of the time, growing things at home takes a lot of patience, which as we all know, is in short supply when it comes to kids. Bonus! When you’re done growing them on one side of the box, turn it around and do the same on the other side!

Nikhil, from Back to the Roots, contacted me a while ago about trying one of their kits. I was immediately drawn to this, because their kits are made with recycled materials, and when you’re done, you can sprinkle the soil from the box right into your garden or as we did, right into the compost bin! So these are a win-win for everyone. (In fact, we noticed over the weekend that the mushrooms are growing in the compost bin now, too. So funny! I should have waited and tried again in the house before composting. Ah well, I can buy another kit!)

I’m also thinking that with Back To School time upon us, how great would it be to buy one of these kits to send to your kid’s teacher? It would be a fun lesson in not only recycling, but growing your own healthy food at home!

A little info about Back to the Roots:

  • Back to the Roots was founded by Alejandro Velez & Nikhil Arora during their last semester at UC Berkeley in 2009.
  • They came up with the idea (during a class lecture) of being able to potentially grow gourmet mushrooms entirely on recycled coffee grounds. Now that’s using class time wisely, in my opinion!
  • Inspired by the idea of turning waste into wages & fresh, local food, they experimented in Alex's fraternity kitchen, ultimately growing one test bucket of tasty oyster mushrooms on recycled coffee grounds.
  • With that one bucket, some initial interest from Whole Foods & Chez Panisse and a $5,000 grant from the UC Berkeley Chancellor for social innovation, they decided to forget the corporate route, and instead, become full-time urban mushroom farmers! 

Their efforts today:

  1. On pace in 2011 to collect, divert and reuse 1 million lbs. of coffee grounds this year from Peet's Coffee & Tea
  2. Help families grow over 250,000lbs of fresh food at home in 2011!
  3. Sustained 10 urban school & community gardens by donating BTTRs premium soil amendment.
  4. Selling the kits at over 300 Whole Foods nationwide! 

So after reading those facts, how could anyone not be on board with a great, eco-friendly business venture like this? Please check out the graphic at the bottom of their “Our Story” page to really see the cycle (or “recycle”) of how the kits are made!

One important point--in the kit directions, it says for best results, soak the inner package for 24 hours before proceeding. This is very important, so please make sure you do this step.

If you’d like to go ahead and order some kits right away, here’s a discount code for you to use to get 10% off: Mushrooms4me10

Back to the Roots is offering to give one of their kits to one of you!

To enter:

  1. Just leave a comment here telling me what plans you have for your own kit. Would you use it yourself, or send it with your child to school? Would you give it as a gift? What would you cook with the mushrooms? You get the idea!
  2. Leave a valid email address so I can reach you if you win, please.
  3. Extra entries if you want to tweet about this or share it on your Facebook wall. One extra entry per tweet or FB share.

That’s it! I’ll choose a winner on Wednesday, Sept. 7th. (US shipping only.)

Disclaimer: I was given a kit to try at home, free of charge. My opinions are my own and not influenced by the supplier of the kit.


Friday
Mar252011

Spinach and Feta Pie, and Food Snobbery

Spinach and Feta Pie

Aside from being addicted to muffins, chocolate, the flavor combo of raspberry and lime, and well…lots of other foods, I’m also addicted to spinach and feta. Wrap it up in crispy, flaky phyllo, and I could eat it every single day. I’ve been in love with it since I was a kid. And lucky me, there’s a Greek Festival in my city that takes place during my birthday week every single year. Can you guess what I ask for? Yes! Spanakopita. You have to get there early, too. Seems it’s usually the first thing to sell out, so I’m not alone in my addiction. Luckily, Billy is a morning person--so he usually gets there first thing--and can live to tell about it. Those crowds are wild!

Before I go on, I’d like to address something that’s been bothering me lately. Food snobbery.

*Begin Rant* It’s everywhere, it seems. And let me clarify--I’m all for using whole foods and avoiding processed foods whenever possible. One step further-if you can use organic foods, that’s even better! But…that’s not always feasible. Ask the single mom of 3 kids that’s working two jobs to make ends meet why she isn’t buying (more expensive) organic foods. Ask her why she may take a couple of shortcuts (and used a processed item or two) when making dinner. I’ll bet she’d give you an earful of “why.” Ask the man who supports his family and just lost his job the same questions. Then maybe ask the people working like dogs all day long, and schlepping their kids around afterschool and evenings, why they don’t have the energy to plant a garden. While gardening is amazing and rewarding, it’s a LOT of work. There’s also an initial investment when you start a garden-you need plants or seeds, and all of the supplies that go along with that. Yeah, seeds are cheaper, but you still need planting supplies. Could be that maybe some people can’t afford that. It’s a sad but true fact. Then there are the folks that live in inner cities or apartments that don’t have any space for a garden at all. This article from my friend Lisa also explains this point very well.

So. This leads me to food world snobbery.

Have we gotten so snobby that one can’t even accept a spin on an original idea? We’d all be eating the same things if no one ever said “Hey, I like your idea! What if I change it up a little by adding this or that?” Why do some feel the need to knock you down because they think they know better? Isn’t it more tactful to say “Wow, that looks great! Maybe next time, you’d like to try it the way it’s done in (insert geographical location)--here’s my recipe for it.” It’s good to be adventurous and try new things. Adapting is good, folks.

Believe it or not, I was (very recently--like this week) accused of misrepresenting a culture’s street food on my blog. Seriously? Seriously. A few clicks and you can tell what recipe/post got someone’s pants in a wad. Wow. Uptight much? I even stated in the post (oops, now I’ve gone and given you the link!) that I couldn’t vouch for authenticity. And yet, this person jumped on it literally two seconds after I tweeted the post link. Yes-it was nearly the next tweet in Twitter’s timeline. Funny, because out of all the people I follow on Twitter, I knew that if anyone would say something, it would be this person. I was right! “Must have a list of links--at the ready! So I can set these poor, starving people straight!” Excuse me while I roll my eyes once again.

One of Julia Child’s favorite things was getting a hot dog from Costco. It’s true! Julia wasn’t a food snob. And yet--some food bloggers think they can scoff and condescend if you don’t meet their standards. The condescension is what gets me the most annoyed. I don’t need cheese from an ancient breed of exceptional goats that only reside in the farthest reaches of the smallest village in the highest peaks of the Swiss Alps. Trader Joe’s will do just fine. and in a pinch? I’ll go to the regular grocery store. Gasp! My chocolate doesn’t need to be handcrafted from the worn hands of an ancient chocolate master that grows cocoa beans on ancient blessed cocoa bean lands. I’m perfectly fine with Ghirardelli.

Get the pole out of you know where and lighten up, please. You may find life and eating to be more fun and fulfilling. You might also gain some new friends! Check out this article. The James Beard Foundation has added a humor category to it’s annual awards. Apparently some food writers think it cheapens culinary journalism. Excuse me?! How backward is it to think that humor is a bad thing? I’ll never understand that kind of thinking.

As far as the post that earned me the “misrepresenting a Greek street food” tweet--does everything need to be corrected to suit someone’s opinion of  how it should be? This person also said he had to “set me straight” in Greek cuisine. Really? Oh, thank you for gracing me with your golden touch. Not. In fact, don’t touch me at all. Is a Spinach and Feta pizza not a spin on Spanakopita? Some guy or girl making pizza somewhere probably said “Wow, spinach and feta is a classic combo--let’s try it on pizza!” And one of my favorite pizzas was born on that day.

These spins on classic dishes may not be perfect or authentic, but you know what? It’s good, home cooked food and it’s delicious and it’s appreciated by the family. So who cares if a food snob doesn’t like it? I don’t. Not anymore. They’re not sitting at my table. *End Rant*

Spinach and Feta Pie

Spinach and Feta Pie

a take on this recipe from BBC GoodFood
makes 2 pies, but you can cut it in half to make just 1

6 (10 oz) bags fresh spinach
2 1/2 cups crumbled feta cheese
2 tbsp fresh dill, chopped
2 tbsp fresh lemon juice
5 eggs, beaten well
1 1/2 cups cooked, diced mushrooms
1 box frozen Phyllo dough
melted butter and olive oil, for brushing between dough layers

Heat the oven to 350. Heat a large skillet over medium heat. Working in batches, add the spinach, covering with a few tablespoons of water. Cover and cook for a couple of minutes, until wilted. Remove from pan and continue until you've used all of the spinach. Set in a colander to drain.

When the spinach is cool enough to handle, again, working in batches, place the spinach in a clean tea towel, and squeeze out as much water as you can. There will be a lot, but get the spinach as dry as possible. Roughly chop the spinach and place it in a medium bowl.

To the spinach, add the feta, dill, lemon juice, eggs and mushrooms. Mix well, set aside.

You can do this in one larger pan or pie plates, but I use 2 (9 inch) cake pans. Follow the directions for using Phyllo that are on the box. Basically, you're going to layer in sheets of the dough, leaving some overhanging the sides of the pan. Continue going all around the pan a few times--so three turns of the pan = 3 layers of sheets. Use the olive oil whisked with the melted butter to brush between the layers. Make sure you've got enough butter set aside for this. Don't start the recipe with only half a stick of butter in the fridge. Plan on at least one, mixed with a fair amount of oil. I didn't measure, just eyeballed and added till I had enough.

Divide the filling between the two pans, and then fold up the edges of the overhanging dough to cover the filling. Add a couple more sheets of dough to the top if you need to. I just loosely dropped a couple sheets over the top of each pie. Brush the tops with the oil/butter mixture and bake for 30-35 minutes, until nicely golden brown on top.

  • A note about working with the Phyllo: I'm guessing some "experts" will say I'm wrong here, but yeah, it's a bit of a pain to work with. Every now and again I get a roll of it that simply won't cooperate. Follow the directions on the box as far as covering it with plastic and damp towels while you work. And if a few sheets fall apart? Don't sweat it! Just layer as best as you can, and fill in any spots with more dough. I think it's impossible to make Phyllo look bad after it's cooked. Any repairs that you make before baking won't show up when it's fully baked.
  • I like to serve this with a green salad, tossed with tomatoes, red onion, and cucumbers, along with this feta vinaigrette.
  • Now, of course you don’t need to make two pies. When I’m doing something like this dish that may be a bit of a pain (working with Phyllo, hehe) I like to make extra and get it all done at once. The cold leftovers are amazing, too! This makes great picnic food, as well.
  • Feel free to leave out the mushrooms if you like. I’ve also made this with the sundried tomatoes and that’s fantastic, too.
  • This would be a lovely addition to any holiday table. Easter will be here before you know it!

Enjoy! Even if it isn’t authentic, it’s damn good. Winking smile

Spinach and Feta Pie


Tuesday
May042010

Pita Quesadillas with Cilantro Hummus

One deck + ice cold cider or beer + good company + these quesadillas = instant good times.

vegetable-quesadillas-7

This one is Recipe #2 in the 5 Essentials article from the current issue of Vegetarian Times.   The first one, Chickpea and Feta Salad, was incredibly addictive.   Here is the idea behind the 5 Essentials:

The current issue of Vegetarian Times has this great article called “By special request…”  Basically, a reader wanted a way to shorten her time at the grocery store.  Their response was five recipes that all had the same five essential ingredients in common.   The five ingredients?

  1. Diced tomatoes
  2. Leeks
  3. Chickpeas (dried or canned)
  4. Baby spinach
  5. Red bell peppers

With these ingredients, plus other basic things that are easy to find or that you may already have, you can make five different recipes.  As a bonus, each one can be made in 30 minutes or fewer!

vegetable-quesadillas-6

Like I said in the Chickpea and Feta Salad post--you may be asking yourself if all of the recipes taste the same with the 5 ingredients.  My answer is absolutely not!  They have the same basics, but with the additional ingredients added to each recipe, they’re all very different.

We really loved these!  The hummus needed a little doctoring up, in my opinion, but it’s a great base recipe for you to play around with, if that’s something you like to do.  Not only are they a satisfying, tasty treat, but they’re also vegan!  A bonus!  I’m betting even meat-eaters would enjoy these.


Pita Quesadillas with Cilantro Hummus
Serves 8

Hummus:

1/2 cup cilantro
2 cloves garlic
1 (15 oz) can chickpeas, rinsed and drained
2 tbsp lime juice
2 tbsp olive oil
My additions:
tahini to taste
cumin to taste
pinch of salt

Quesadillas:

4 (7 inch) whole wheat pitas, split
jarred roasted red peppers, sliced
1 1/2 cups baby spinach

Heat oven to 350.
Make the hummus: pulse the cilantro and garlic in a food processor until chopped.
Add the chickpeas, lime juice, and olive oil, and process till completely blended.
Taste and see if you'd like to add cumin, tahini or salt.  I think I also added an extra little splash of lime juice at this point.
Set aside.

Place 4 of the pita halves on a baking sheet lined with foil. 
Spread each with about 1/2 cup of hummus.
Top with the peppers and spinach, then the rest of the pita halves.
Bake until crisp.  They say about 10 minutes, but it took about 15 for ours to get good and crispy.
Cut into wedges and serve with salsa and any other stuff you like.

vegetable-quesadillas-crop-2

  • These are vegan, but they certainly don’t have to be.  Feta would be amazing in these, but you could try your favorite cheese.
  • We had these with Oxford Falls Fried Green Tomato Salsa, which is a tomatillo based salsa.  It’s so freaking good--fresh tasting with just a touch of heat.  You really need to get yourself some!   And while you’re at it, try some of their amazing Bloody Mary Mixes--you won’t be sorry!  
  • Same 5 Essentials, but this one tastes completely different, and just as delicious, as the Chickpea and Feta Salad. 
  • Too hot to turn on the oven?  Try crisping these babies up on the grill!
  • Next up in the 5 recipes is a veggie packed pasta sauce.   That we also loved.  Stay tuned!

Oxford Falls Fried Green Tomato Salsa:

oxford-falls-fried-green-tomato-salsa

 vegetable-quesadillas-5